Web Push Notifications Part 2
In this part we will add event listeners for the push event in the service worker. Next we will get the PushSubscription.
TABLE OF CONTENTS
- Handling Push Events
- Debug Push Notifications
- Getting the Push Subscription
- The Push Subscription
HANDLING PUSH EVENTS
When we send a push message to a user, the push event gets triggered in the service worker. To show this push notification we need to trigger the notification in the service worker.
self.addEventListener("push", (event) => {
  const data = event.data.json();

  const { title, body, icon } = data;

  event.waitUntil(
    self.registration.showNotification(title, {
      body,
      icon,
    })
  );
});
In this code snipped handles the push events.
The registration.showNotification() method returns a promise, that is resolved when the notification is shown. The event.waitUntil() method tells the browser that work is ongoing until the promise settles. This extends the lifetime of the push event until the showNotification Promise resolves.
DEBUG PUSH NOTIFICATIONS
To test that our push event handler works, we can send a fake push message with the Chrome DevTools.
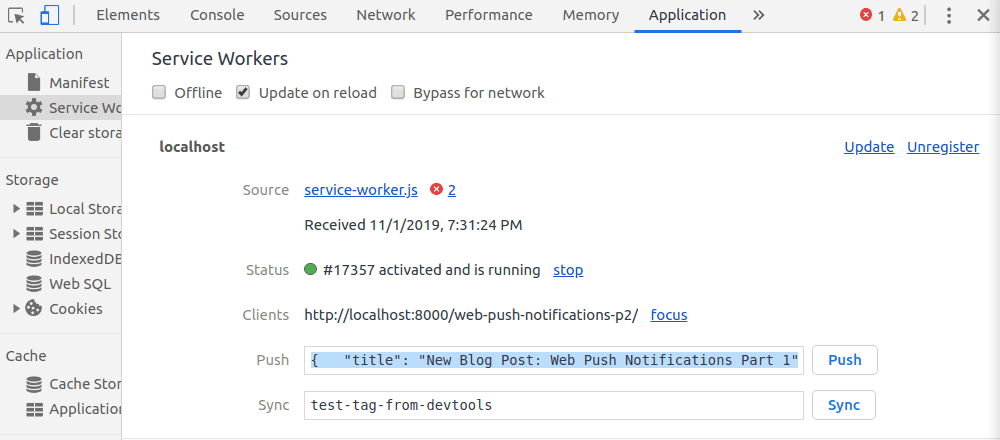
To do this you can copy and paste the JSON example below.
{
  "title": "New Blog Post: Web Push Notifications Part 1",
  "body": "Get a better understanding of how Web Push Notifications work"
}
Now after clicking push, the push notification should be shown.
GETTING THE PUSH SUBSCRIPTION
Before we can send push messages, we need to get the push subscription. We do this by calling the registration.pushManager.subscribe() method.
async function subscribeUser() {
  registration = await navigator.serviceWorker.ready;
  subscription = await registration.pushManager.subscribe({
    userVisibleOnly: true,
    applicationServerKey: urlBase64ToUint8Array(
      "BBAtkVJ3LU8ab8R49xs-WD3PVt7tfLmWcDZHH8zN01ZfUTEc3VTs2PQlpsZxTbAeNPe11vRwaCkf2DpQZ2LTsG8"
    ),
  });

  console.log(JSON.stringify(subscription));
  return subscription;
}
To get back the subscription object, we need to pass in userVisibleOnly, and the applicationServerKey.
userVisibleOnly:\ You must pass in a value of true. This means that you should not send silent pushes - web pushes without showing a notification.
This was added because people were scared that the Push API might be abused for malicious stuff, without the user knowing.
applicationServerKey:\ The applicationServerKey is used by the push service of the browser to identify your web app. It is the public key that we are sending here, there also is a private key that should be - you guessed it - kept private. We will need it later to send push messages.
To generate the KeyPair you can head over to web-push-codelab.glitch.me.
THE PUSH SUBSCRIPTION
The subscription that gets returned from registration.pushManager.subscribe() method looks like this:
{
  "endpoint": "https://fcm.googleapis.com/fcm/send/cR3Ymg9at0M:APA91bHXt5kDJ__JY-L3ZmrcC3VOlnF400_s9HvZQgmyjM9tbqxvLRrQuTBeRQoifxMItb_cTQ3Sxl7t553R2Y53dQSBncStFdu99A8qejCamh4XHeJKVCS3bEEM1fCOPLEuZPg7BJqn",
  "expirationTime": null,
  "keys": {
    "p256dh": "BO8IrAO6iEJOpVVkCBMMGt_iBAWUMWdjc4r9GOqiRS1rmPR5KYtZhnkeBb5fHqHp7pudxY6Dy8neJPgNwmKn4q8",
    "auth": "CPWYdCPWXfICigMixAqJ4g"
  }
}
The most important property is the endpoint. The endpoint is the push services URL. To create a push message we need to send our message to this URL. The endpoint is also a user ID because every endpoint is unique to one user.
Once we have the push subscription from a user, we can finally send web push messages to this user.
In Part 3 we will get into the server side of things.